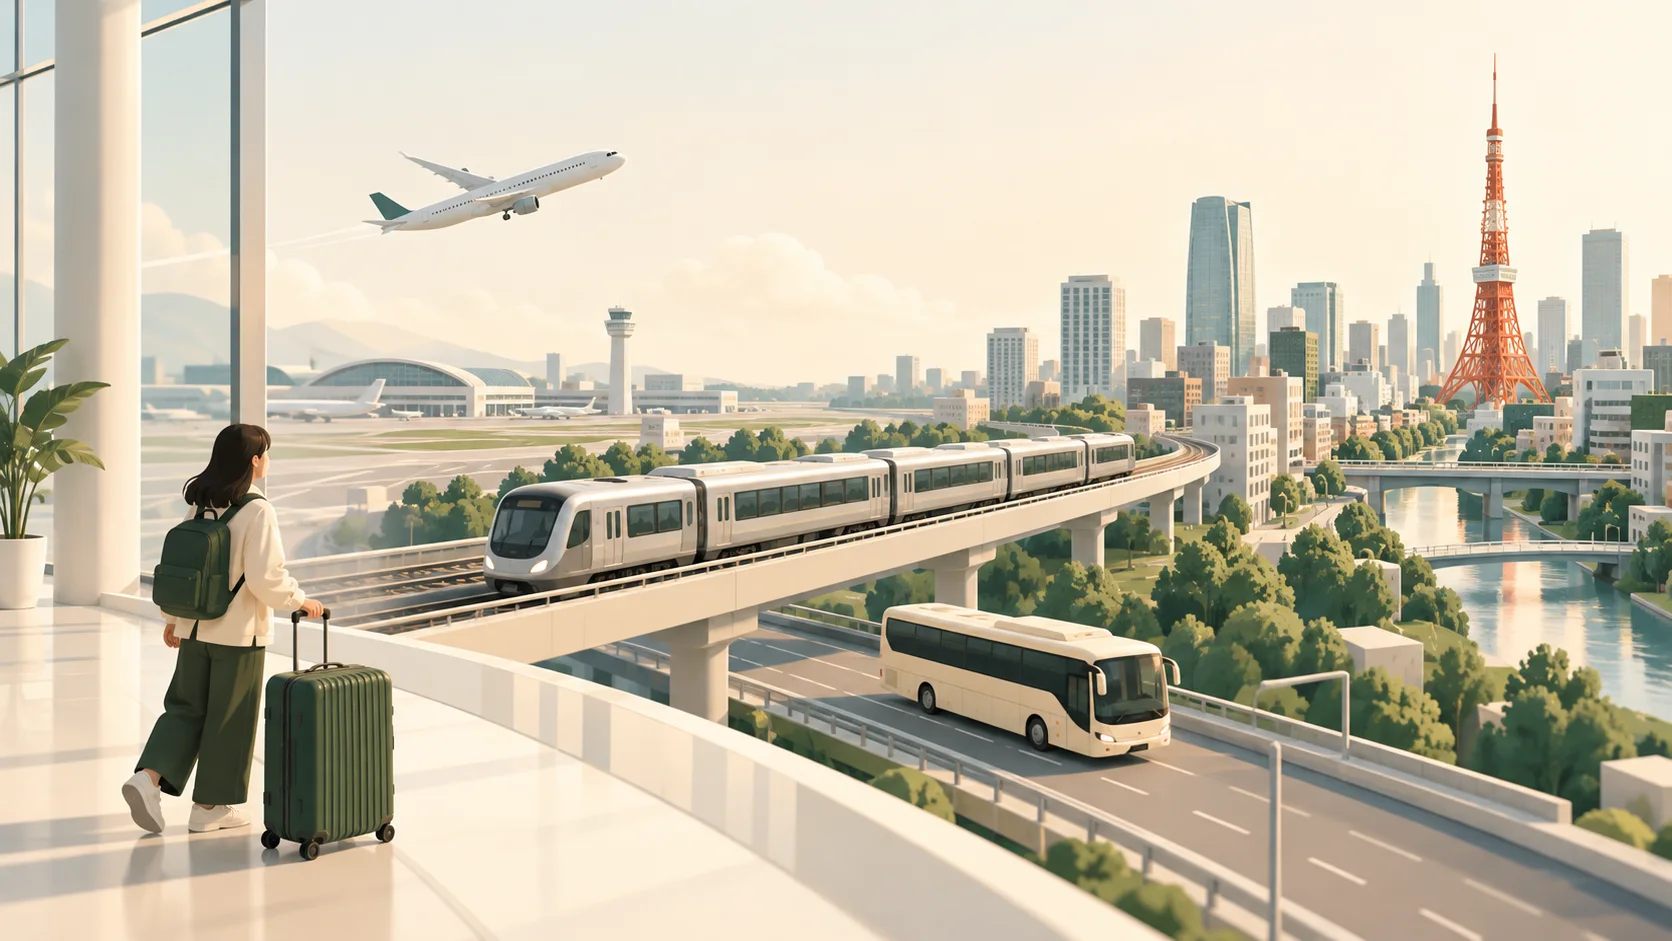
Connect your arrival terminal, hotel entrance and everyone’s luggage before choosing a train, bus or booked transfer. Narita and Haneda call for different routes, and return tickets have their own collection, direction and validity rules. Decide separately whether Suica credit or a timed subway ticket fits each day in the city. This guide follows the journey from landing to departure, using official prices and conditions checked on 21 October 2026.
Choose transport from your hotel, arrival time and luggage, then choose tickets
Break a Tokyo airport transfer into three parts: reaching the station or bus stop after landing, travelling into the city, and getting from the arrival stop into your hotel. A workable first day needs all three. Comparing only the fastest train time can overlook ticket-collection queues, carrying luggage between trains and a hotel on the far side of the station. Write down your hotel address, arrival terminal and the group’s luggage count together before collecting every discount offer.
From Narita, first compare the Skyliner toward Ueno and Nippori, the Narita Express N’EX toward stations including Tokyo and Shinjuku, and Limousine Buses serving particular hotels or stations. From Haneda, start with Keikyu, the Tokyo Monorail and buses that suit your hotel’s location. Add a quote from a legally operating taxi or private-transfer provider if you need door-to-door service. Prices and product conditions here reflect official information checked on 21 October 2026; confirm service and availability before buying.
Choose cards after settling the route. Suica mainly handles prepaid deductions; a reserved-seat limited-express ticket covers the relevant train journey and seat; Tokyo Subway Ticket covers timed travel within specified subway networks. You can combine these functions, but check each charge and entitlement. If your Tokyo base is undecided, use the comparison of hotel neighbourhoods and daily routes to narrow it down, then return to airport transport.
HND or NRT? Check the terminal as well as the airport
Save both the airport code and terminal from your flight confirmation. HND is Haneda and NRT is Narita: their stations, buses and transfer meeting points differ. A booking that says only “Tokyo airport” leaves the driver and your companions without a usable destination. Check the arrival date in Japan’s local time too. An overnight flight can require a transfer booking on a different calendar date from the day you boarded at home.
International flights at Haneda may use Terminal 2 or Terminal 3; check your own flight. Haneda Airport’s transport information provides separate arrival directions for the terminals. Connect your post-immigration floor, rail entrance and bus ticket office before deciding which counter to visit. Official Terminal 2 and Terminal 3 arrival videos help explain the layout, but do not replace current flight information or establish that a particular service has seats.
If your group arrives on separate flights, specify the terminal and a particular public area after immigration as the meeting point. Before one person collects everyone’s reserved tickets, check whether the other passengers, their passports or the whole group must be present. If those requirements are unresolved, meeting in the public area after each person finishes arrival formalities is usually easier to adjust than relying on an unfamiliar ticket counter.
Work backward from the hotel entrance to reduce luggage handling
Locate the hotel entrance relative to nearby stations, rather than relying on the district named in the booking listing. A room described as “Ueno” might be near JR Ueno, Keisei Ueno or another subway station. Shinjuku hotels may be near the West Exit, South Exit or a more distant neighbourhood. A hotel requiring another subway ride after the airport train may suit a different service from one within walking distance. Check the address, entrance and lift route before departure.
With a pushchair, wheelchair or large bags, turn each transfer into concrete steps: which gate to leave, whether to change floors, where the lift is and whether the street route crosses a major road. A navigation app saying “one transfer” does not describe the platforms and corridors involved. Compare a direct train, a bus stopping at the hotel, or a short taxi ride after the station. Choose according to the walking your companions can manage and your budget.
If the hotel has an airport bus stop, check that it appears for your date, direction and particular departure. A stop sign does not mean every bus calls there, and another branch with a similar name is not your hotel. Include the first and last day’s connections when comparing accommodation costs. The breakdown of a Japan travel budget helps separate room charges, transport and unexpected expenses, rather than saving a small fare by staying somewhere less convenient every day.
Compare airport routes by destination and how you will travel
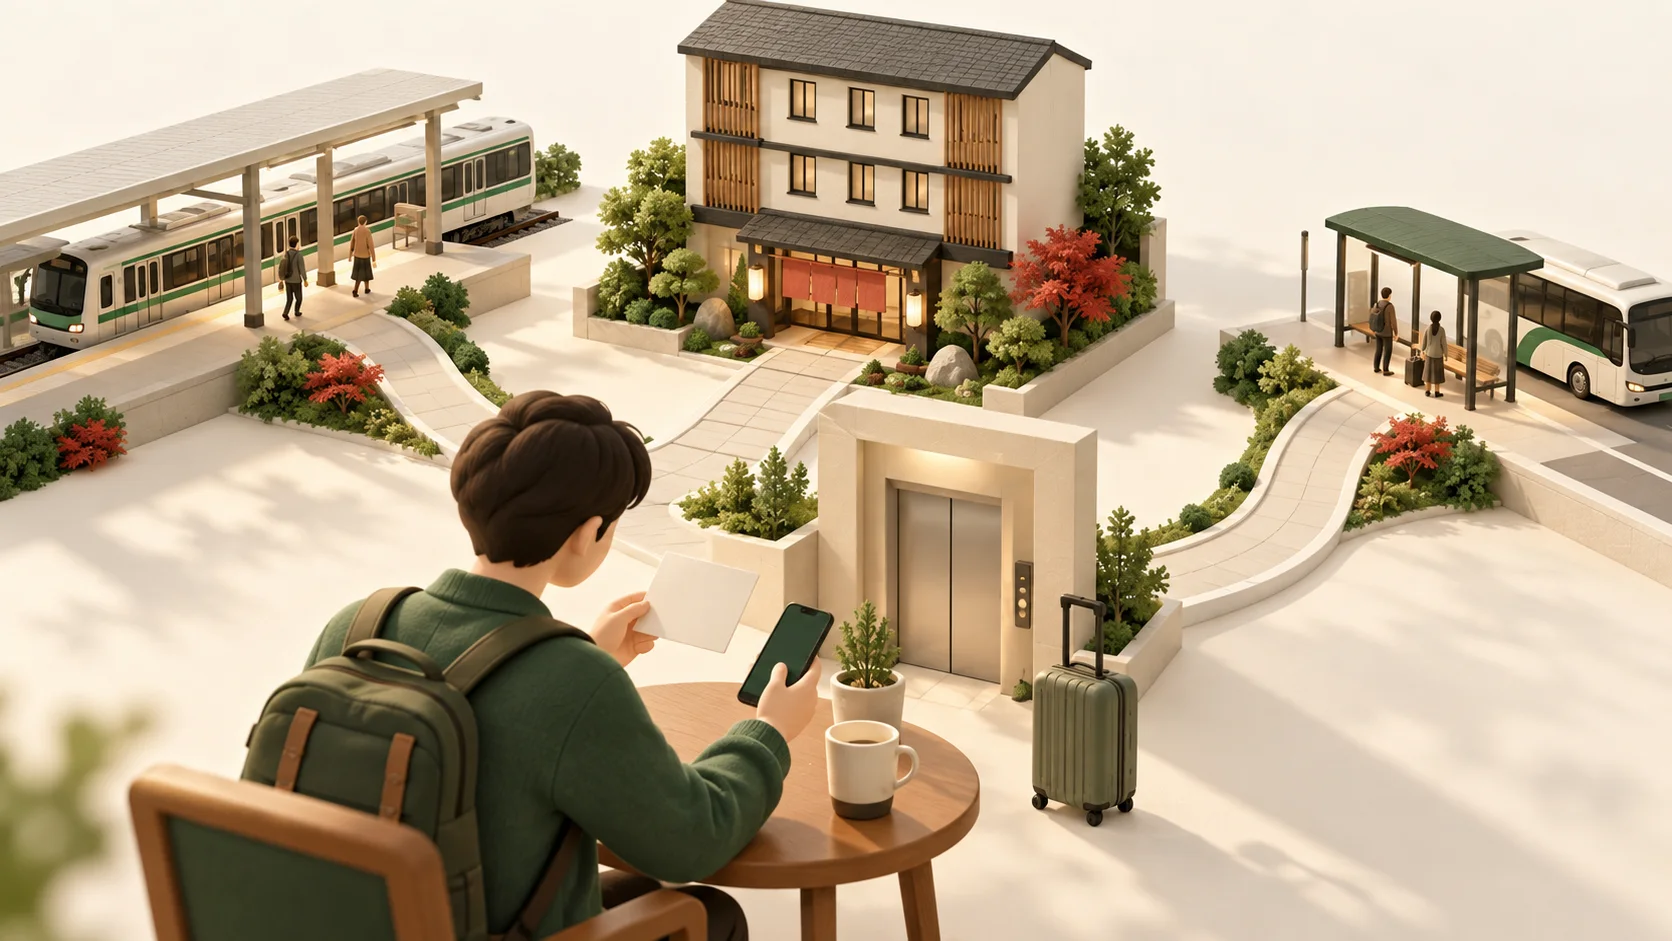
Use the comparison below to narrow your options. Pick two routes that actually connect to your hotel, then compare dates, total cost, last departures and walking. Rail fits a timetable-based plan; buses may reduce transfers and street-level luggage handling. Both require checking operations and your onward connection. A private airport transfer can reduce handling, but its quote must specify passenger, luggage and vehicle limits.
The fastest journey time describes travel between particular stations on a particular service. Keisei’s minimum of 36 minutes is a Skyliner example from Narita Airport Terminal 2·3 Station to Nippori. It excludes reaching the station, collecting tickets, waiting and getting to your hotel. Add those stages when comparing Narita to Ueno or Shinjuku. Keeping arrival day free of a must-attend activity usually leaves more flexibility to choose transport.
Keep one alternative that is straightforward to use. Your main plan might be rail, with a bus considered if trains stop running; or a hotel bus, switching to operating rail if you miss it. Save the alternative’s destination and hotel entrance in the same offline note. You do not need to buy two competing tickets in advance. If you travel between cities the following day, use the guide to rail tickets and longer journeys in Japan to assess local and intercity transport separately.
| Arrival situation | Compare first | Then check |
|---|---|---|
| Narita; staying around Ueno or Nippori | Skyliner and connecting trains | Walk from the Keisei station exit to the hotel |
| Narita; staying near an N’EX stop such as Tokyo or Shinjuku | N’EX and Limousine Bus | Stops on the actual train, ticket collection and return conditions |
| Haneda; hotel connects conveniently through Keikyu or the Monorail | Keikyu or Tokyo Monorail | Train destination and lift route for transfers |
| A designated hotel stop; less luggage handling preferred | Limousine Bus | Whether it serves your hotel, road conditions and time margin |
| Late arrival or a larger group with many bags | That date’s night bus, legal transfer or nearby accommodation | Usable departures, vehicle capacity and complete price |
Narita to Ueno: decide between Nippori and Keisei Ueno
For an Ueno-area hotel, compare walking from Keisei Ueno first; if you need the JR Yamanote Line or another JR connection, compare changing at Nippori. Each has advantages, depending on the hotel entrance or connecting platform. Keisei Ueno and JR Ueno are separate station areas, and walking between them with luggage takes time. Their shared “Ueno” name does not make them the same ticket gate.
Keisei’s Skyliner purchasing guide lists the basic fare and limited-express charge separately and states that all seats are reserved. The standard adult magnetic-ticket total to Nippori or Keisei Ueno is ¥2,580: a ¥1,280 basic fare plus a ¥1,300 limited-express charge. Paying the basic fare by IC card still requires an appropriate limited-express ticket. A sufficient Suica balance handles only the relevant payment component, not a seat reservation on a particular Skyliner.
Check the date, departure, origin station, car and seat on each Skyliner ticket. If everyone buys separately, your seats may not be together. Address that during booking or collection rather than trying to exchange seats after boarding. At Nippori, follow JR-transfer signs and the procedure for your ticket type. If you are unsure which ticket to insert, show staff all your tickets and the connecting destination before tapping a card and risking duplicate payment.
Buying Skyliner tickets: standard fares, online discounts and return products
The official Skyliner discount page currently lists online one-way fares of ¥2,310 for adults and ¥1,150 for children ages 6–11; online return fares are ¥4,500 and ¥2,240 respectively. Exchange of the return product is restricted to Narita Airport Terminal 1 Station or Terminal 2·3 Station. You cannot make the initial exchange at Ueno or Nippori. Compare these specific product conditions separately from standard station purchases.
Before buying, read what payment actually gives you. Some products provide an exchange voucher, some require another step to choose a train, and some already specify a seat. Follow the actual product page and confirmation. Travel-platform purchases may have their own exchange locations, amendment rules and cancellation deadlines. When searching for Skyliner tickets through Klook or another seller, compare that seller’s terms instead of automatically carrying over the official online discount’s price and refund rights.
For a Skyliner and Tokyo Subway Ticket combination, calculate the value of the airport journey and the timed subway ticket separately, then check collection and activation. A bundle may not help if you will take only one or two subway rides; add excluded journeys if your base mainly relies on JR. When flying out of a different airport, compare one-way options first. There is no reason to detour back to Narita simply to use a return ticket you already bought.
Narita to Shinjuku: consider direct N’EX trains, but check the stops and date
If your hotel is near an N’EX stop such as Shinjuku, Shibuya, Shinagawa, Tokyo or Yokohama, compare the direct reserved-seat train. Avoiding a luggage-heavy transfer can be especially helpful on arrival day. Enter the actual destination and date when reserving and check your train’s stops. Do not assume every departure serves every city shown in a route advertisement. Include the remaining walk to the hotel.
For a return journey, see JR East’s N’EX TOKYO Round Trip Ticket. It currently costs ¥5,200 for adults ages 12 and over and ¥2,600 for children ages 6–11. It is for holders of non-Japanese passports, which must be shown at collection. Within 14 days, it provides one journey from Narita to the Tokyo area and another back to Narita. Compare one-way tickets if you arrive at Narita but leave from Haneda, or your trip exceeds the validity period.
A search for “Narita to Shinjuku by Skyliner” often means taking the Skyliner and changing trains. Treat Skyliner to Nippori followed by JR as another complete route, recalculating fares, waiting and the luggage transfer. Compare it with N’EX all the way to the hotel door. A direct service has a reasonable value if fewer transfers preserve your companions’ energy and the total fits your budget; the shortest station-to-station figure is not the only consideration.
The N’EX return ticket: 14 days, travel order and leaving the gates
The return ticket has a defined order: travel from Narita into the city first, then from the city back to Narita. The Tokyo-area stations can differ between journeys, which helps if you stay near different stops at the start and end. You cannot reverse the product, using it from Tokyo to the airport before using the other half into the city. Write down your return date, validity period and departure airport to see whether you can use the ticket as intended.
JR also explains that after leaving N’EX you can connect to other JR East trains within the ticket’s designated area, provided you remain inside the gates. Once you exit, that journey’s validity ends. This can connect the airport to your final JR station; it does not allow you to leave Tokyo Station for a meal and then reuse the same half to Shinjuku. Budget a separate onward journey if you want to stop outside the gates.
An eligible adult completing the return journey for ¥5,200 can allocate ¥2,600 to each direction for budgeting, but this does not make half the ticket independently transferable or a one-way product at that price. Different Tokyo-area endpoints may help when arriving near Shinjuku and staying in Yokohama before departure. If your itinerary is unsettled, keep ¥5,200 as one possible option and buy after confirming both hotel locations and the departure airport.
Collecting N’EX tickets and reserving seats after a late arrival
The JR product page lists Narita Terminal 1’s Travel Service Center as open 8:30–19:00 and the centre at Terminal 2·3 Station as open 8:30–20:00. Reserved-seat ticket machines and JR Ticket Offices at both stations are listed separately as 6:30–21:45. These are different services. The earliest service-centre closing time does not mean every collection option has closed, but an operating machine does not guarantee it can handle every voucher.
Keep the confirmation, required identification and passenger details accessible offline. At the station, check the collection method specified by your order before looking for a suitable counter or machine. Complete the train’s seat reservation if you want an assigned seat. If you have an eligible ticket without an assigned seat, follow JR’s vacant-seat conditions. When a late arrival is close to the last train, ask which departure you can still collect and reserve before paying or switching transport.
JR currently announces changes to some N’EX services on 6–8 November 2026. Use the train-by-train operating tables for the Yokosuka and Sobu Rapid Line construction work to check whether your train terminates at Tokyo, rather than assuming the usual direct trip to Shinjuku. For other dates, check current notices in the Narita Express operating information too. If reaching the city is no longer practical, compare an airport-area hotel and travel the next morning. Check rooms, shuttles and check-in times separately; “near the airport” does not mean available for immediate check-in.
Narita Limousine Buses: hotel stops and Shinjuku destinations differ
A Narita Airport Limousine Bus often earns its place by stopping at a hotel or a station convenient for your accommodation. The current Narita–Shinjuku route page lists one-way fares of ¥3,600 for adults and ¥1,800 for children, with a timetable-change notice dated 1 October 2026. Shinjuku West Exit, Shinjuku Expressway Bus Terminal (Busta Shinjuku) and individual hotels are different stops. Choose the one you need and check that your departure calls there.
The official route page lists stops including Shinjuku Washington Hotel, Keio Plaza Hotel and Hyatt Regency Tokyo; that does not mean every departure serves them all on every date. For another hotel, find the closest practical stop and any slopes or major roads before comparing rail. Searches for Narita Limousine Buses to Ikebukuro or Ginza should lead to the official route-and-stop directory by district, not an assumption that the Shinjuku fare applies elsewhere.
Bus journey times depend on roads, stops and traffic that day. Keep the first restaurant booking or activity after arrival flexible; allow even more road-delay margin on departure day. Include the walk from hotel to stop, waiting and airport check-in to obtain a usable total. If the hotel’s direct bus is full, compare other stops with available seats and a short onward connection. A sold-out bus is not evidence that all transport from the airport has stopped.
For a trip from Narita to Odaiba or Ariake, first check the hotels actually served by this Narita route, then choose a bus using the terminal-by-terminal departure and hotel-arrival timetable. The timetable revised on 1 October 2026 lists stops such as Tokyo Bay Ariake Washington Hotel and Grand Nikko Tokyo Daiba. Departure times differ between Narita Terminals 3, 2 and 1, and not every service calls at your chosen stop. Check the route page’s event-related service notices again before travel; do not apply Haneda or Shinjuku timetables or fares to this route.
Keikyu or Tokyo Monorail from Haneda: check the destination and connection
Start by checking whether your hotel connects more easily through the Keikyu network or via Hamamatsucho and JR. Keikyu’s official destination and fare search lets you look up routes by terminal and station; the Tokyo Monorail connects to JR at Hamamatsucho. Both serve different hotel areas. Include the street-level walk and luggage transfers, rather than comparing only a few minutes aboard the train.
Keikyu trains have different destinations and connections, so check the destination display and stopping pattern on the platform. Not every train leaving Haneda follows the same route to your intended station. Search the actual departure terminal, destination and date on the official site, then save the train destination and transfer point. For hotels near Asakusa or Higashi-ginza, particularly check whether that departure runs through or requires a change.
The Tokyo Monorail suits journeys connecting at Hamamatsucho. Use its official station and transfer information to check station names and exits. Changing to JR with luggage still means locating the next platform and the route toward your hotel. If arrival day only needs check-in and dinner, a route you can easily recognise is enough. Save your neighbourhood walks around Tokyo for the following day rather than crossing the whole city on the first evening.
Haneda Limousine Buses: look up Shinjuku, Odaiba and hotel routes separately
The Haneda–Shinjuku and Nakano bus information currently lists one-way fares of ¥1,400 for adults and ¥700 for children. The route includes different station and hotel stops; use the departures, direction and stops actually offered when booking. When you see Shinjuku West Exit, Busta Shinjuku or a hotel name, identify the stop you need and the route from that stop to your room entrance.
A Haneda Limousine Bus route map shows districts you can reach; the timetable shows departures on your date. These serve different purposes. Select the destination again for Odaiba, Ariake, Tokyo Disney Resort or another district, rather than carrying over the Shinjuku fare or last departure. If the hotel’s service is infrequent and the next bus is far off, compare the total fare and time for rail followed by a short ride from a nearby station.
Select the correct terminal when buying. The same bus may call at terminals in sequence, with different departure times and waiting locations. Match the ticket, current display and boarding point instead of changing terminals merely to follow an old screenshot. If a companion goes to buy water or exchange money, agree on the exact stop and latest meeting time. A bus is not guaranteed to wait for someone still inside the terminal.
Limousine Bus reservations, changes and refunds: keep the confirmation offline
Keep the bus confirmation, QR boarding ticket and original sales channel together. The official website provides guest and member order procedures; travellers without an account still need the confirmation email. If buying through a hotel or platform, confirm collection, changes and refunds through that seller. A card-charge notification alone does not tell you which departure or stop to use.
Airport Transport Service’s booking and cancellation FAQ says online changes or cancellations must be completed at least 5 minutes before the reserved departure. The normal cancellation refund fee is ¥110 per person. A delayed flight does not automatically guarantee a bus refund; act when you know you will miss it. If the operator announces a cancelled service, use its service-cancellation refund procedure rather than cancelling yourself first and incurring an avoidable fee.
Find the order link in the confirmation before travelling, rather than searching your inbox with an unstable airport connection. Read back the date, terminal, destination and passenger count, and let a companion keep the necessary details too. After a change, use the latest confirmation and remove confusing old departures from your phone notes. Check refund settlement and whether the seat is retained separately; two temporary card notifications are not a reason to buy again.
Luggage, pushchairs and wheelchairs: check the whole route to the room
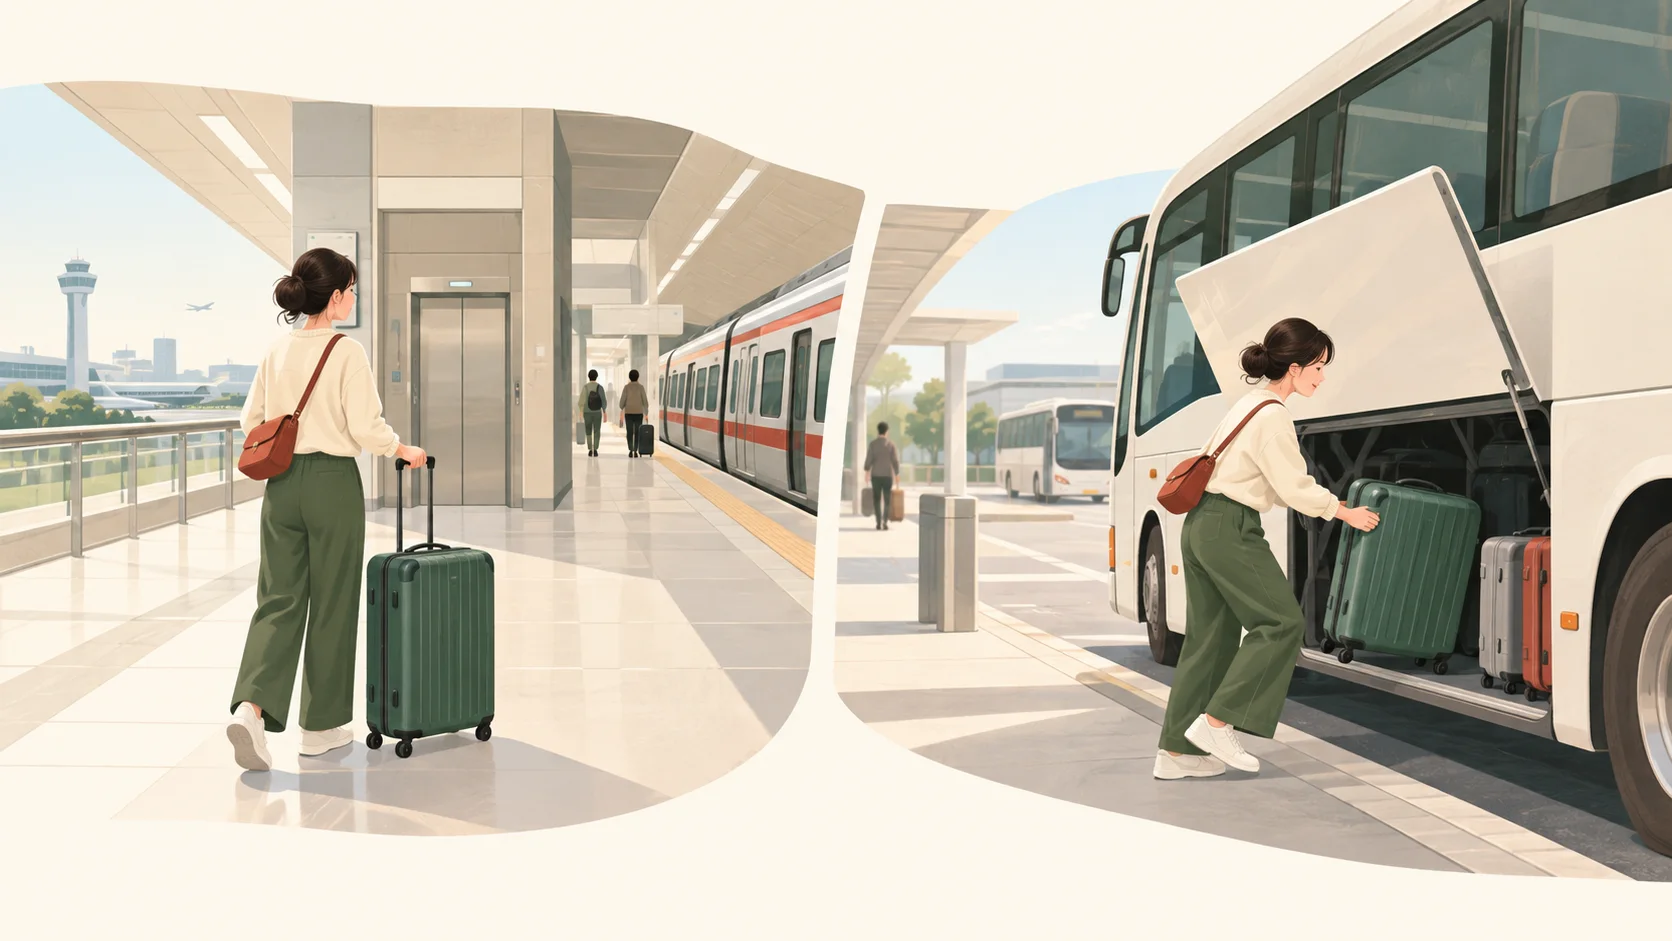
For rail travel, confirm that you can carry all your bags aboard and stow them safely. A transfer station having lifts does not mean every exit leads step-free to the hotel. With many bags, having one person scout ahead while another watches them is easier than carrying everything through the wrong exit and backtracking. Keep aisles clear; carry valuables and medication needed that evening in a bag you can watch.
The Limousine Bus baggage rules generally allow up to 2 pieces per person, each within 50×60×120 cm and 30 kg, while warning that jointly operated routes may differ. The lower-cost LCB bus from Shibuya to Narita separately lists 1 piece per person. Check your actual product and carrier’s terms. Follow the restrictions for passports, cash, delicate equipment and other items unsuitable for the luggage compartment, keeping them with you; a general allowance does not permit every type of item.
If you cannot transfer out of a wheelchair, establish whether the specific vehicle has the equipment you need. The Shinjuku route’s official explanation says standard vehicles are not low-floor buses and a wheelchair cannot simply be rolled aboard. Stowing a folding wheelchair and handling a powered wheelchair have different conditions. Confirm assistance with the actual operator before choosing a complete hotel connection. Ask separately about folding a pushchair and whether an infant needs a seat before booking.
Late-night Haneda transport: dates, terminals and the last shuttle matter
For an evening arrival, choose transport using the time you expect to reach the public arrivals hall, rather than touchdown time. Immigration, baggage collection and finding the station can take longer than expected. Near the last train, keep late-night buses, legally operated transfers and nearby accommodation as usable alternatives. Do not lose track of companions or leave identification at a counter while rushing for a train whose ticket you have not collected.
The official Haneda late-night and early-morning bus page currently lists departures from Terminal 3 toward Shinjuku and Ikebukuro at 0:20, 1:00, 1:40 and 2:20, among others, with an adult fare of ¥2,800. Terminal 1 and Terminal 2 calls differ on some departures. This is the timetable information available at checking, not an unchanging year-round last-bus guarantee. Confirm a bookable departure and the correct terminal for your travel date.
For example, a 0:20 departure on 15 November must be booked for 15 November, even if the flight lands on the evening of 14 November. Check the calendar date and phone time zone together. If you need an interterminal shuttle before the night bus, check its last departure too. Overnight flights do not establish that every city service or free terminal shuttle operates all night. Your first hotel must also accept your actual arrival time, or getting into the city may still leave you unable to check in.
Terminal transfers: Narita T3 and the limits of Haneda’s free services
For rail from Narita Terminal 3, use Airport Terminal 2·3 Station (空港第2ビル駅), allowing for travel between terminal and station. The airport’s T2–T3 walkway explanation gives about 13 minutes between the specified station gates and terminal information counter, excluding the walk to airline counters and formalities. A general rail-access page gives a broader estimate. With luggage, allow time for the actual route; the shorter published walking estimate does not cover the full time you need before your flight.
To reduce walking, use Narita’s step-by-step T3 route to Airport Terminal 2·3 Station to find the free terminal bus or walkway. The exits and floors can differ between outward and return journeys; follow signs on site. Check whether you need JR or Keisei before passing the gates. They share the station area but have separate ticketing and gates, so the ticket must match the entrance.
Haneda provides free terminal buses; see the interterminal travel guide for hours, stops and wheelchair assistance. Its separate free rail terminal-transfer ticket is for eligible connecting-flight passengers and requires the specified evidence for collection. A visitor travelling into the city cannot treat it as free urban transport. If you reach the wrong terminal or meet someone in another one, confirm the appropriate public shuttle and include waiting and changes of floor.
Travelling from Narita (NRT) to Haneda (HND) means changing airports. Start with the Narita-to-Haneda Airport Limousine Bus timetable. Its columns list Narita Terminals 3, 2 and 1 and Haneda Terminals 2, 1 and 3 separately. Some services do not pick up at Narita Terminal 3, and some do not stop at Haneda Terminal 3, so choose a departure that serves both of your terminals. Traffic can affect arrival time; the bus journey duration is not an airline’s minimum connection time. You also need to check entry requirements, baggage collection and the next flight’s check-in deadline, and confirm the requirements for your itinerary with the airline.
Private transfers, flat-rate taxis and metered taxis are different products
Distinguish a booked private transfer, a taxi with a flat rate for specified areas, and a regular taxi charging by distance and time. A private-transfer quote should identify the actual operator, vehicle, seats and luggage capacity, flight-delay waiting, meeting point, nighttime charges, tolls and parking. Enough passenger seats do not necessarily mean enough room for everyone’s bags. Obtain explicit answers in the quote and confirmation for child seats, wheelchairs or language assistance.
For a named example, Narita Airport’s official taxi guide describes airport-rank flat-rate taxis from Narita to Tokyo operated by members of the Narita International Airport Taxi Operations Committee. Shinjuku Ward is in Zone D: ¥31,500 via Keiyo Road or ¥32,500 via the Shuto Expressway Bayshore Route. No advance reservation is needed; tell the driver you want the flat rate when taking the taxi. Expressway tolls and other actual costs are extra; journeys from 22:00 to 5:00 carry a surcharge, and using the Aqua-Line adds charges. These flat rates assume expressway use; journeys on ordinary roads are metered. Check separate terms for Nihon Kotsu reservations, other operators or trips back to the airport. For Haneda, confirm the current route, vehicle and full price directly with the operator.
The airport chauffeur service described in Nihon Kotsu’s earlier official information is a different product from an ordinary flat-rate taxi. An updated official quote has not been verified, so the old starting prices should not be treated as current bookable rates; confirm the route, vehicle, travel date and any expressway or parking charges with the operator first. When comparing services, list the actual meet-and-greet arrangements, waiting terms and vehicle capacity alongside the quote. If an ordinary flat-rate taxi meets your needs, the shared label “airport transfer” is no reason to pay for a different service. Do not assume that a cheaper platform offer includes the promises of a premium product.
Choose between ordinary Suica, physical Welcome Suica and Mobile
Suica is a prepaid electronic card whose balance is deducted for travel or purchases, reducing the need to buy ordinary tickets separately. Ordinary Suica, the physical Welcome Suica for short-stay visitors, and Welcome Suica Mobile have their own issuance and refund conditions. Consider your phone, children’s requirements and length of stay, then choose something you can actually use. There is no need to load large balances onto several cards just to collect them.
JR East’s ordinary Suica guide lists a ¥500 deposit for a physical ordinary card, with returns governed by the issuer’s rules. Refunding the balance of a JR East-issued card incurs the specified handling fee. The short-stay physical Welcome Suica guide instead lists 28 days from purchase, no deposit and generally no refund of unused credit. Both have area and route limits. Acceptance in many locations does not mean uninterrupted long-distance travel across all IC-card areas.
The official Welcome Suica Mobile product page currently targets compatible Apple Pay devices and an iOS app. Users must be at least 13, validity is 180 days from issuance, and remaining credit is nonrefundable. Regional laws, location services and system versions can affect issuance or loading. If searching for Android, Samsung or an APK, check the official supported-device list. NFC alone does not establish compatibility, and you do not need an installer from an unfamiliar website to test it.
Buying and loading Welcome Suica: add what you will use soon
For physical Welcome Suica, check the official sales locations and loading instructions for outlets such as Narita’s two rail stations and the Tokyo Monorail station at Haneda Terminal 3. One machine does not establish the same service is available in every terminal at all hours. Keep the reference paper supplied with the card as required; it contains validity and balance information. The GOOD THRU marking on the back is not necessarily the end of this purchase’s 28-day validity.
The short-stay physical Welcome Suica is loaded with yen cash at supported ticket machines, fare-adjustment machines or Seven Bank ATMs, following the screen instructions. The balance limit is ¥20,000. Do not transfer Mobile’s credit-card loading procedure to this physical product. Start with near-term transport and a little shopping credit, then add more as needed. If limited-express or bus tickets are already paid for, do not add those same fares again when estimating the balance required.
A routine refund of leftover credit at departure differs from a faulty-card procedure. The official fault refund requires checking the card number, obtaining documentation and following specified dates; it is not a way to withdraw any unused money. A separate 180-day physical Welcome Suica is listed for bulk group sales, not as the same card any visitor can necessarily buy at a counter. Read the product name and reference paper you actually receive to keep these validity periods separate.
Children and family cards: check age, school status and seats separately
Start the family budget with who needs a separate seat, then check each operator’s child category. The N’EX return ticket lists children ages 6–11, with a child ticket required for children ages 5 and under occupying their own seat; Skyliner discounts also list ages 6–11. Limousine Bus separately explains that a 12-year-old still in primary school can qualify for child fares, and preschool children occupying a seat need a child ticket. Do not apply one age boundary to every product.
If a child needs an IC card, bring age evidence such as a passport and follow the actual issuing rules. Welcome Suica child-card eligibility has a March 31 deadline after the 12th birthday, which must be understood alongside the short-stay card’s own 28-day validity. A child card deducts the child fare when applicable; it does not reserve a limited-express seat. Arrange the relevant limited-express ticket separately.
A parent setting up Mobile does not mean children can take turns passing the gates on the same card. Each fare-paying passenger needs an appropriate individual ticket. Decide who keeps each one and who helps the children at the gates. If identical plain ticket holders cause confusion, add a family marker to an outer holder without obscuring necessary ticket information. Check bookings by passenger too, so you do not pay an adult fare yet arrive unable to find a child’s seat.
Suica and limited-express trains: avoid paying the basic fare twice
First check whether your limited-express product already includes the basic fare. The Skyliner purchasing page separates the basic fare and express charge; confirm what prepaid credit can pay and what grants a reserved seat. Use a discounted ticket including both according to that ticket’s gate instructions. If you already have a complete paper ticket but tap Suica to enter, you may start another journey record that needs adjustment. Show staff the ticket and IC card before entering if unsure.
The Mobile page illustrates purchasing and linking reserved-seat train tickets through JR-EAST Train Reservation. You must complete the eligible purchase and linking steps; adding credit alone does not let you board N’EX. Check separately that you have found the train option, paid successfully and linked the ticket correctly for gate entry, and retain the seat details. With another platform or paper ticket, do not redo an already valid booking merely to unify payment.
Before leaving Tokyo for Nikko, Hakone or Mount Fuji, check the next route’s ticket type and coverage. Suica can pay in many places, but consecutive travel across IC areas, unsupported routes and additional limited-express tickets remain issues. The distinctions between Nikko routes and passes and Hakone transport-pass coverage help with the next stage. Keep intercity or touring passes separately rather than assuming one card handles the entire trip.
Tokyo Subway Ticket coverage and prices: separate JR, airports and private rail
Tokyo Subway Ticket mainly provides travel on all Tokyo Metro and Toei Subway lines within its valid hours. Its coverage is not every railway with “Tokyo” in its name: check JR Yamanote, airport expresses, the Tokyo Monorail and other private-rail sections separately. A through-running train may continue beyond the covered network, but the ticket does not expand with it. Pay the additional section as required.
According to Tokyo Metro’s current visitor-ticket information, adult 24-, 48- and 72-hour tickets cost ¥1,000, ¥1,500 and ¥2,000; child tickets cost ¥500, ¥750 and ¥1,000. An ordinary paper ticket’s clock starts at first gate entry; check the seller’s deadline for exchanging a voucher separately. Counter sales for foreign visitors check passports. Do not transfer eligibility rules for other Japanese resident offers or attraction bundles wholesale to overseas visitors.
List the actual sections you expect to travel each day before choosing. A base beside JR with mainly JR journeys may offer little use for a subway ticket. A day involving Asakusa and Ginza may be worth adding up if the actual routes largely use covered subways. Calculate the airport-to-city journey separately; consider activation for the first covered subway ride afterward. If the first night involves one stop to the hotel, paying separately can preserve the timed ticket for busier days.
| Duration | Adult | Child | Main coverage |
|---|---|---|---|
| 24 hours | ¥1,000 | ¥500 | Tokyo Metro and Toei Subway |
| 48 hours | ¥1,500 | ¥750 | Same networks, 48 consecutive hours |
| 72 hours | ¥2,000 | ¥1,000 | Same networks, 72 consecutive hours |
Is the subway ticket worth it? Calculate planned journeys, not ride counts
Add the covered fares you would pay anyway, then compare the ticket. These are recalculable assumptions, not quoted station-pair fares: four ¥250 journeys within 24 hours total ¥1,000, matching an adult 24-hour ticket. Four ¥200 journeys total ¥800, making the pass ¥200 more expensive. Four rides alone do not establish that any four journeys break even.
Next check whether the hours cover the following day. Suppose the planned covered fares are ¥900 and ¥850 on two days, totaling ¥1,750. If both fit within 48 consecutive hours, a ¥1,500 ticket saves ¥250. Add only ¥250 on day three and the three-day total is ¥2,000, the same as the 72-hour ticket. Flexibility for an unplanned route change may matter, but do not add distant sights you never wanted to visit just to increase apparent savings.
Put JR, airport lines and excluded private-rail payments in a second column instead of counting them as pass savings. Calculate for each passenger, especially children with different fares: dividing the adult example by two is not a reliable conclusion. Finally ask whether your companions want a route requiring another subway transfer to use the pass. If extra walking saves very little, convenient pay-as-you-go travel may suit you better.
Paper, QR and IC products do not all activate at the same time
Identify whether you bought a travel ticket or a voucher that must be exchanged for one. A travel platform providing a QR code does not necessarily mean that code opens the gates; some products still require exchange at a specified machine or counter. Read the confirmation’s exchange and usage steps before departure. Check the original voucher’s validity separately from activation of the ticket received, rather than discovering at the gates that your phone only has an order number. If you have not yet bought a ticket, consult the “訪日外国人旅行者の方への対面発売” (in-person sales for visitors from overseas) section on Tokyo Metro’s ticket information page for travellers for detailed purchase instructions and sales locations. These are official purchase details, not redemption locations for every platform’s vouchers. For a platform voucher, follow the confirmation from the channel you used.
Tokyo Metro’s official Japanese page lists ordinary paper and QR products as timed from first gate entry, but a particular Tokyo Subway Ticket (IC) product starts at purchase. That IC product has restricted purchasers, sales locations and PASMO conditions. “IC” does not mean the same product can be loaded straight onto Suica. Nor should you buy a version whose clock starts immediately and leave it unused for several days. Check the complete product name and conditions.
An actual QR travel ticket has separate rules for starting use, distributing tickets to companions and refunds. The operator also warns that some station gates do not support QR processing; ask staff or use the intercom there. Keep the phone charged and able to display a valid ticket. For a family, organise individual tickets and distribution beforehand while someone watches the children, instead of crowding everyone at one gate before looking for internet access or signing in.
Airport-and-subway bundles: compare usable components, activation and refunds
Break a bundle into two questions: will you use both airport journeys, and do the subway hours cover your actual travel? For Skyliner plus Tokyo Subway Ticket, compare the separate total before checking the bundle’s current price, exchange method and each component’s validity. Only savings created by your actual trip belong in the budget. An unused return journey or unused subway hours are not money saved just because the package advertises a discount.
To travel into Tokyo from Haneda, start with Keikyu’s official Fare and Time Search to compare ordinary tickets from the airport to the station where you will actually connect. Then calculate the cost of a subway pass separately for your routes within the city. Until you have checked the product’s full conditions, including the sections covered, single or return travel, activation, changes and refunds, leave any bundle discount out of your budget. If your hotel is on a JR line or your return flight leaves from Narita, check especially carefully whether you will use both the subway and the airport component.
Changes and refunds are part of the price comparison. An unused subway ticket, an activated timed ticket, an airport-train seat and an attraction bundle may all have different refund conditions. If plans may change, identify which payment is most likely to be cancelled before deciding when to buy. Save the original channel’s link and confirmation so a delay sends you back to the right seller, not to another company’s counter for an order it cannot amend.
A five-day Tokyo example: separate airport, city and side-trip needs
Take a five-day, four-night stay in Shinjuku, arriving and leaving through Narita, as an example. On day one, take an N’EX or bus that connects to the hotel, with only a nearby dinner after check-in. Arrange city routes by neighbourhood on days two and three, then compare a 48-hour subway ticket with individual fares. Use the appropriate route ticket for a side trip on day four. List day five’s Narita departure, boarding point and airline requirements separately. This is a planning example; check actual services and attraction operations for the date.
If staying in Ueno with an easy walk to Keisei Ueno on both the first and last days, include a Skyliner return product in the comparison. Tickets for the intervening days still depend on actual routes. Your accommodation need not move with the airport line every day. Choosing a base convenient for your main activities and connecting it with one manageable airport route usually preserves more sightseeing time than changing hotels twice over an airport-fare difference.
For Kawaguchiko, put the outbound bus terminal and departure time into day four before deciding where to stay on night three. Tokyo–Mount Fuji highway-bus reservations and boarding points help with that separate route and ticket. If you are still choosing how many cities to visit on a first trip, the guide to cities and nights for a first Japan itinerary helps determine how many nights Tokyo needs before you buy an appropriate airport return ticket.
A budget for two adults and one child: airport fares first, connections next
Assume two adults and one child who qualifies for each product’s child category and needs a seat, completing a return journey by the same transport. N’EX return tickets cost 5,200×2+2,600=¥13,000; the official online Skyliner return discount totals 4,500×2+2,240=¥11,240. They have different endpoints and usage rules, so add the hotel connections. The ¥1,760 difference is not automatically the difference between final trip costs.
Using Shinjuku buses as another example, a Narita return journey costs (3,600×2+1,800)×2=¥18,000; the ordinary Haneda–Shinjuku service totals (1,400×2+700)×2=¥7,000. They serve different airports, so do not ignore airfare, flight times and accommodation needs when comparing the difference. Recalculate with the nighttime fare for a late-night service instead of carrying the ordinary Shinjuku fare past midnight.
List city transport, luggage storage, connections after the station and possible cancellation charges separately. Only if both adults and a child qualifying for child fares actually need 72-hour subway tickets should you add 2,000×2 for adults and 1,000 for the child, totaling ¥5,000. Recalculate individual fares if most journeys use JR. Money loaded onto Suica is a balance for later deductions: do not record both the load and the deducted fare as two transport expenses.
| Option | Calculation | Family total | Check before buying |
|---|---|---|---|
| N’EX return ticket | 5,200×2+2,600 | ¥13,000 | Non-Japanese passport, 14 days and travel order |
| Online Skyliner return discount | 4,500×2+2,240 | ¥11,240 | Exchange at Narita and onward destination |
| Narita–Shinjuku bus return | (3,600×2+1,800)×2 | ¥18,000 | Actual stops, departures and child eligibility |
| Ordinary Haneda–Shinjuku bus return | (1,400×2+700)×2 | ¥7,000 | Ordinary service; recalculate night fares |
Plan the return around your airline’s check-in deadline
Read your airline’s requirements for the particular domestic or international flight, then work backward through airport arrival, transport departure and leaving the hotel. The bus FAQ offers general arrival guidance, but an airline may impose an earlier baggage-drop, document-check or check-in deadline. Online check-in does not mean all airport formalities can be skipped. Set the destination as your airline’s correct terminal, avoiding an unexpected terminal transfer at the end.
Book an acceptably early return service rather than only the last one that theoretically works. Allow for finding the rail platform and moving bags, road delays on a bus, or confirming a transfer driver, meeting point and included waiting. Check operations again before leaving the hotel. Discovering a need to switch sooner gives you more choices and more time to change or cancel the original ticket.
On the last evening, organise documents, tickets and contact details for the next stage. Keep breakfast and shopping within time that does not squeeze the return journey. If returning an ordinary Suica or dealing with a faulty card, check the appropriate counter and hours separately; do not assume all remaining credit can be refunded at the boarding gate. Checking out, retrieving stored bags and walking to the stop are a complete process. Include them in the hotel departure time.
Delays and cancellations: deal with the existing ticket before switching
If the flight is delayed, first check your transport ticket’s status and amendment deadline. Missing a normally operating departure differs from the operator cancelling it. Do not assume heavy rain means suspension; check the company’s current notice and order updates. Before buying another ticket, save the old booking number, cancellation result or remaining usage options to avoid unnecessary duplicate journeys in the same direction.
For a missed train reserved through JR-EAST Train Reservation, the N’EX product FAQ describes using available seats on later trains the same day, without an assigned seat and with an obligation to yield to its reservation holder. Check the actual ticket and day’s operations for applicability. Amend through the original channel if there is still time. Do not extend this same-day provision to the following day or interpret available seats as a guarantee your whole group can sit together.
Before switching to a bus, check seats, luggage acceptance and the hotel connection from the arrival stop. For a transfer vehicle, confirm the actual quote and waiting arrangement first. If no transport suits, ask the hotel about a delayed arrival or compare airport-area rooms accepting check-in. Alternatives have their own costs and availability. Keeping the original ticket and delay documentation can assist later inquiries, but does not justify promising compensation in advance.
Save a one-page plan you can follow after landing
Put the outward journey on one page: Japan date, flight and terminal, hotel address in Japanese, operator and complete product name, collection or activation steps, station or bus-stop name, and the route from arrival stop to entrance. Label the ticket itself separately from the order link. Follow current signs if an official map changes. Your saved note should remind you what to find, not turn an old platform number into a permanent answer.
Walk through the plan from your companions’ perspective: who holds the child’s ticket, who handles bags, whether the address works offline and whether you can name the next stop when asking for help. Use actual official videos to understand the terminal and illustrations to understand choices. If you still cannot explain which ticket goes through which gate, reduce ticket types or transfers until you can describe the entire process clearly.
Save the return journey separately, including the airline deadline, chosen transport and backup. A good airport plan lets you adjust to conditions after arrival, reach the hotel with everyone’s bags and keep a margin for departure. Add an appropriate prepaid card or subway ticket once that route is settled. Continue planning each day with Tokyo itineraries organised by neighbourhood.
A few useful answers
Is Skyliner the first choice from Narita to Ueno?
Compare walking from Keisei Ueno with a JR transfer at Nippori. Their hotel connections differ. Skyliner requires an appropriate limited-express ticket and valid basic-fare coverage; loading Suica alone does not reserve a seat.
N’EX or Limousine Bus from Narita to Shinjuku?
Check which Shinjuku exit suits the hotel and whether a convenient hotel bus stop exists. Compare total time and price to the door and luggage handling. The N’EX return product separately requires the right passport, 14-day validity and travel order.
Can I use the N’EX return ticket when arriving at Narita and leaving from Haneda?
Its second journey returns to Narita, not Haneda. Compare one-way tickets for an arrival at Narita and departure from Haneda, and budget the Haneda route separately.
Can I exchange the discounted Skyliner return voucher in Ueno?
The official online return-discount page restricts exchange to Narita Terminal 1 Station or Terminal 2·3 Station; the initial exchange cannot be at Ueno or Nippori. Check other products with their original seller.
Are there buses from Haneda to Shinjuku after midnight?
At checking, the official page listed Terminal 3 night services toward Shinjuku and Ikebukuro. Select the actual Japan date, terminal and bookable departure. Some terminal calls apply only to particular buses; check shuttles and late hotel check-in too.
Does Tokyo Subway Ticket include airports and the Yamanote Line?
The basic ticket covers Tokyo Metro and Toei Subway. JR Yamanote and airport sections are not automatically included. Read the full conditions for an airport bundle, and pay separately beyond covered areas.
When do the subway ticket’s 24, 48 or 72 hours start?
Ordinary paper tickets and the official QR version start at first gate entry. A particular official IC version starts at purchase. Exchange vouchers and travel tickets differ too; check the complete product name and seller’s steps.
Are physical Welcome Suica and Mobile both valid for 180 days?
The normal short-stay physical card lasts 28 days from purchase; Welcome Suica Mobile currently lists 180 days from issuance. A separate long-validity physical version is sold in bulk to groups, not under the same conditions as the normal short-stay counter product.
Does NFC on Android make Welcome Suica Mobile compatible?
The official product checked currently targets iOS and compatible Apple Pay devices. Check the supported-device list and current notices, rather than assuming NFC is enough or testing an APK from an unofficial website.
Can Suica credit be refunded?
Check the product. Ordinary physical Suica has issuer, deposit and refund rules; unused credit on short-stay Welcome Suica and Mobile is generally nonrefundable. Faulty cards have a separate procedure, not a routine unused-balance refund.
Does a child travelling free on airport transport automatically get a seat?
No. Products such as N’EX and Limousine Bus require child tickets when preschool children occupy their own seats. Check age, school status and accompaniment with the actual operator, and include everyone’s seat needs in the budget.
Does a flat-rate Tokyo airport transfer exclude all extra charges?
Check the quote. Particular flat-rate taxis and chauffeured-car products may add tolls, parking, nighttime or other charges, with cancellation, waiting and capacity conditions. Use the complete terms you actually receive.
Check with the source
Schedules, availability and rules can change. These official sources are the place to confirm details before you book.
- Haneda Airport | Terminal-specific transport and arrival directions
- Haneda Airport | Free terminal shuttles and rail tickets for flight connections
- Narita Airport | Step-by-step T3 route to Airport Terminal 2·3 Station
- Narita Airport | T2–T3 walkway timing and what it excludes
- Keisei | Skyliner reserved seats, basic fares and express charges
- Keisei | Online Skyliner discounts and return-ticket exchange conditions
- JR East | N’EX return-ticket prices, eligibility, direction and collection
- JR East | Narita Express ticketing and operating information
- Keikyu | Haneda destinations, fares and journey searches
- Tokyo Monorail | Connecting stations and tickets
- Airport Transport Service | Haneda–Shinjuku and Nakano routes
- Airport Transport Service | Narita–Shinjuku routes
- Airport Transport Service | Route directory by district
- Airport Transport Service | Reservations, children, delays and cancellation FAQ
- Airport Transport Service | Cabin bags, luggage-compartment allowances and exceptions
- Airport Transport Service | Haneda night and early-morning departures and dates
- Haneda Airport: taxi access information
- Narita International Airport | Airport-rank flat-rate taxi zones, routes and charges
- JR East | Ordinary physical Suica deposits and refunds
- JR East | Short-stay Welcome Suica and coverage
- JR East | Welcome Suica sales, children, loading and faulty-card procedures
- JR East | Long-validity Welcome Suica for bulk sales only
- JR East | Welcome Suica Mobile requirements and official video
- Tokyo Metro | Full conditions for paper, IC and QR timed tickets
- Tokyo Metro | English Tokyo Subway Ticket information for visitors
- JR East | Yokosuka and Sobu Rapid Line works and train-specific N’EX changes
- Narita to Haneda: select an airport-transfer bus for both terminals
- Narita to Odaiba and Ariake: hotel stops and service notices
- Narita terminal departures and Odaiba/Ariake hotel arrivals